| PAST |
June 19, 2006 |
NEXT |
|
Botanical Monday |
| PAST |
June 19, 2006 |
NEXT |
 |
 |
| * Quality * |
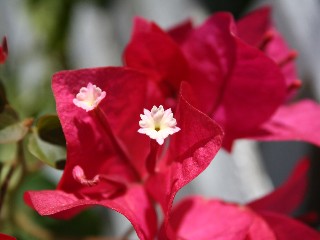
Here I took a simple shot of a bougainvillea on the side of my house. Naturally, as I always do, I resized it down for this posting. But out of the center of that original high resolution shot, I cropped the normal size image that I send, just to show how much I actually do have to resize them down.
I've had lots of people ask me how they can resize their own images to send out to other people, so that they are not so big. Definitely with digital photography growing to much higher resolutions and pixels, sending out the full-size is most often just an annoyance to the recipient as they wait and wait to download some massive image of somebody's stupid cat. And while it may be an interesting picture, they don't need it to be that large, unless they request it. So I try to give people the best advice for resizing the images.
Now my other camera had a feature where it would store two separate files of each and every image. One at full resolution, and the other at a much smaller file and image size, which is what I have usually posted here. However, it appears that my new camera doesn't have that feature so I will just have to resize each one myself and save it as another file.
Most cameras also have the ability to take smaller size images within their settings, but I recommend against this. Much like I have always told people never to take pictures with the camera set to black and white. Because you can always turn the images to black and white on the computer, but you can't easily add the color back to an image. The same goes with size. Always take the images with the highest resolution possible. That way you can always make them smaller, but you can't make them larger without losing quality.
Now as far as resizing the images, I will go into much more detail about that at another time, and hopefully will post some informative pages on my web site for people to learn more about digital photography and computer graphic editing and enhancement.